How to Configure robots.txt in WordPress for Better SEO
The robots.txt file is a small but powerful text file that can significantly impact your site’s SEO. It tells search engine crawlers what content they are allowed to access and what should be left alone. When used correctly, it improves crawl efficiency, protects sensitive parts of your site, and ensures your most important content gets indexed. In this guide, we’ll explain everything you need to know about robots.txt in WordPress — from basics to advanced configurations.

Understanding robots.txt and Its Role in SEO
What is robots.txt?
robots.txt is a plain text file located at the root of your website (e.g., https://yourdomain.com/robots.txt). It contains instructions for search engine bots (also known as crawlers or spiders) that visit your site.
Why It Matters for WordPress Sites
By using robots.txt, you can:
- Control which parts of your website are accessible to search engines
- Prevent search engines from crawling duplicate, irrelevant, or private content
- Direct crawlers to your XML sitemap
- Improve crawl budget, especially on large sites
Default WordPress robots.txt Behavior
Virtual robots.txt in Core WordPress
If you haven’t manually created a robots.txt file, WordPress generates a virtual one automatically. It typically looks like this:
User-agent: *
Disallow: /wp-admin/
Allow: /wp-admin/admin-ajax.phpCode language: HTTP (http)
Where is it Located?
Even if not physically created, you can access it via:
https://yourdomain.com/robots.txtCode language: JavaScript (javascript)Limitations of the Default File
The virtual file is limited and cannot be customized unless a physical robots.txt is created in the root directory of your hosting server.
How to Manually Create a robots.txt File
Using FTP or File Manager
- Open cPanel or FTP client
- Navigate to the root folder (usually public_html or /htdocs)
- Create a new file named robots.txt
- Set permissions to 644 (readable by the web)
Sample Recommended Configuration
User-agent: *
Disallow: /wp-admin/
Allow: /wp-admin/admin-ajax.php

Sitemap: https://yourdomain.com/sitemap_index.xmlCode language: HTTP (http)
This allows bots to index everything except the admin area and directs them to your sitemap.
Best Practices for an SEO-Friendly robots.txt
Allow vs Disallow – How to Use Them Properly
- Disallow: tells bots what NOT to crawl.
- Allow: specifies exceptions within disallowed folders.
Linking Your XML Sitemap
Always include your sitemap URL at the end:
Sitemap: https://yourdomain.com/sitemap_index.xmlCode language: JavaScript (javascript)Allowing CSS & JS for Googlebot
To ensure your site is fully rendered by Google:
User-agent: Googlebot
Allow: .js
Allow: .cssCode language: HTTP (http)
Blocking Low-Value Pages
To avoid wasting crawl budget, consider blocking:
Disallow: /?s=
Disallow: /search/
Disallow: /author/
Disallow: /tag/Code language: HTTP (http)
Common Mistakes to Avoid
Blocking wp-content or wp-includes
Never block these folders — they contain essential CSS, JS, and images needed for rendering:
Disallow: /wp-content/ ❌
Disallow: /wp-includes/ ❌Code language: JavaScript (javascript)
Blocking Plugin Assets
Some plugins serve assets via custom paths. Blocking them may break layout or functionality.
Misusing Disallow: /
This blocks your entire website — only use if your site is under construction or private.
Forgetting to Add Sitemap
This reduces crawl efficiency. Always include your sitemap URL.
How to Test and Debug Your robots.txt File
Google Search Console’s robots.txt Tester
Use GSC → Crawl → robots.txt Tester to:
- Check syntax
- Submit updated file
- See if Googlebot is blocked
Coverage Reports and Live Testing
Use the URL Inspection Tool to check if a specific page is being blocked or rendered incorrectly.
Comparing robots.txt to Other SEO Controls
robots.txt vs meta robots noindex
- robots.txt: Prevents crawling
- meta noindex: Allows crawling but excludes from index
Use noindex when you want bots to read the page but not show it in search.
Should You Use Both?
Yes, for more granular control. For example:
- Use robots.txt to block entire folders
- Use noindex on individual low-value pages
Editing robots.txt with SEO Plugins (For Non-Tech Users)
Using Yoast SEO Plugin
- Install and activate Yoast SEO
- Go to SEO → Tools → File Editor
- Create or edit robots.txt
- Paste the recommended rules and save
Example:
User-agent: *
Disallow: /wp-admin/
Allow: /wp-admin/admin-ajax.php
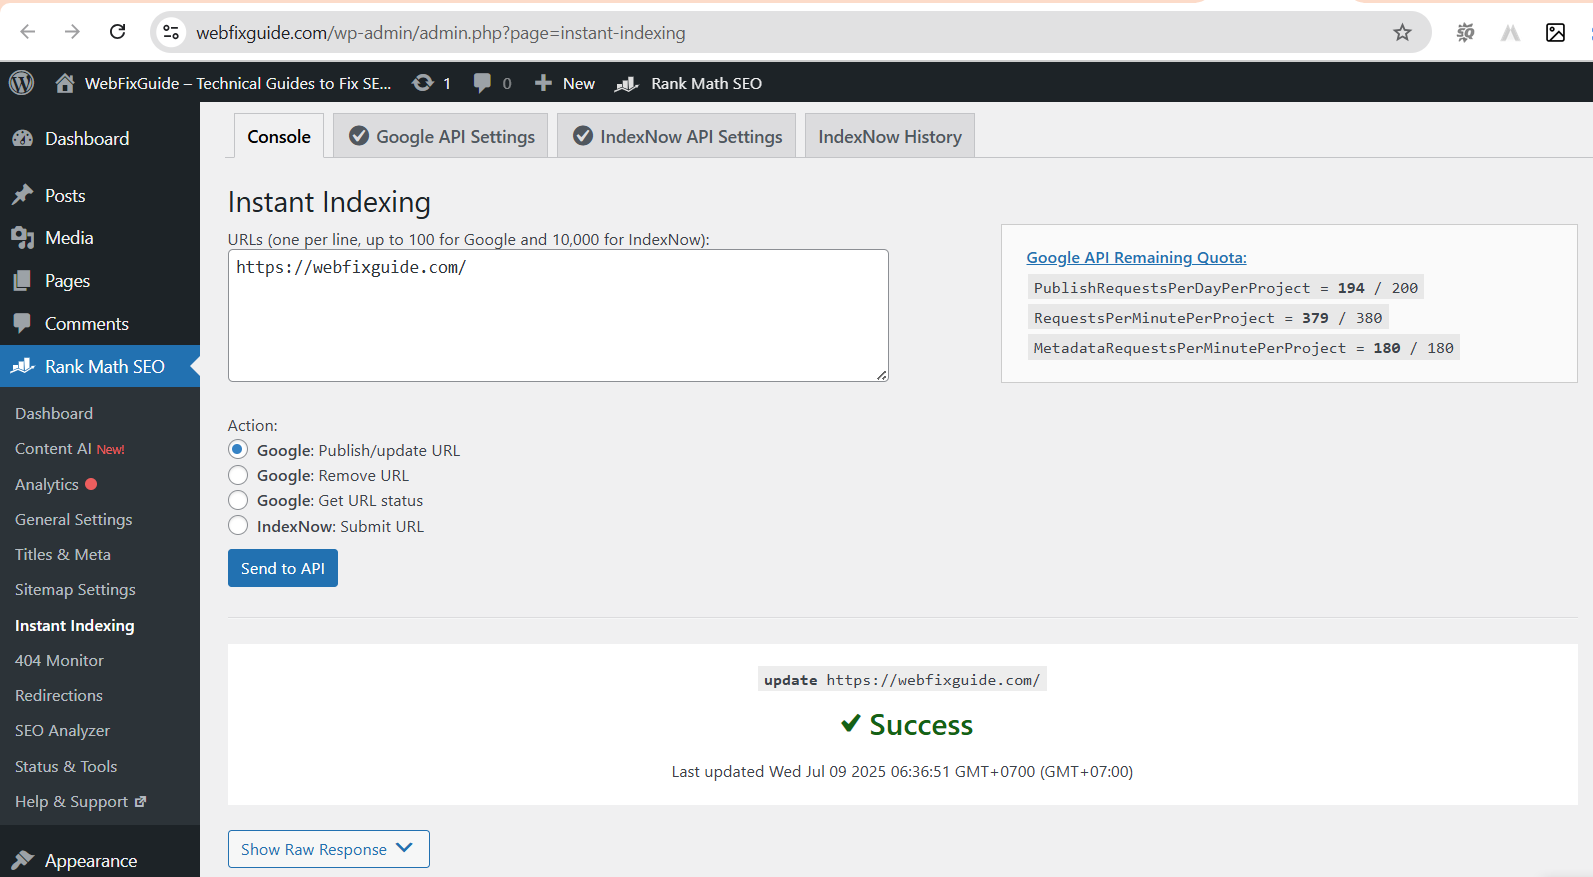
Sitemap: https://yourdomain.com/sitemap_index.xmlCode language: HTTP (http)Using Rank Math SEO Plugin
- Install and activate Rank Math
- Go to Rank Math → General Settings → Edit robots.txt
- Paste your rules and save
Example:
User-agent: *
Disallow: /wp-admin/
Allow: /wp-admin/admin-ajax.php

User-agent: Googlebot
Allow: .js
Allow: .css

Sitemap: https://yourdomain.com/sitemap_index.xmlCode language: HTTP (http)
Rank Math allows you to fine-tune permissions by user-agent and integrates well with its sitemap module.
Final SEO Checklist for robots.txt in WordPress
- ✅ Do include your sitemap
- ✅ Do allow JS and CSS for rendering
- ✅ Don’t block wp-content or wp-includes
- ✅ Don’t use Disallow: / unless needed
- ✅ Test using GSC robots.txt tester
- ✅ Keep it updated after plugin/theme changes
A properly configured robots.txt file ensures that search engines can efficiently access and index your most valuable content while avoiding clutter and crawl traps. Whether you’re a developer or a beginner using SEO plugins, taking control of your robots.txt file is one of the smartest SEO steps you can make for a WordPress website.
RELATED POSTS