How to Set Up Instant Indexing for Google with Rank Math in WordPress
How to Set Up Instant Indexing for Google with Rank Math in WordPress
Want your blog posts, product pages, or SEO content to appear on Google within minutes after publishing? This guide shows you how to integrate Instant Indexing for Google with Rank Math on WordPress to make it happen.
Why Use Instant Indexing for Google?
If you’re serious about WordPress SEO, you know how important fast indexing is. Google’s traditional indexing can take days—but with Google Indexing API, you can index faster and gain a competitive edge.
Benefits of Instant Indexing:
- Google crawls your new/updated URLs in minutes
- Ideal for fast-moving content (e.g. news, trending topics, time-limited offers)
- Boosts visibility and Rank Math SEO efforts
Step 1: Install the Plugin
Before installing, please make sure that the Rank Math SEO plugin is already installed and activated on your website.
Once Rank Math is set up, you can install and activate the Instant Indexing for Google plugin directly from the WordPress plugin repository.
Alternatively, you can download it from https://s.rankmath.com/downloadapifiles and upload it manually via the WordPress plugin uploader.
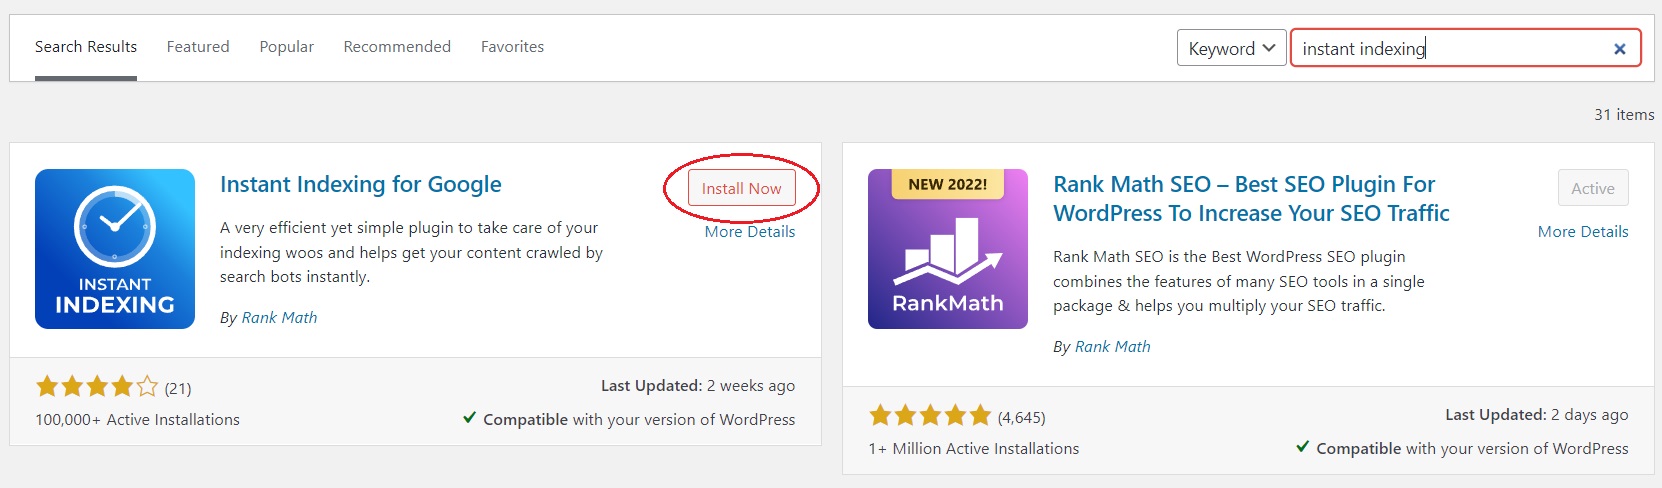
- In your WordPress dashboard, go to Plugins → Add New
- Search for: Instant Indexing for Google
- Click Install and then Activate

Step 2: Create an Indexing API Project on Google Cloud
To use Google’s Instant Indexing API, you need to create a dedicated project on Google Cloud Console and enable the required API. Follow these steps:
Go to Google Cloud Platform.
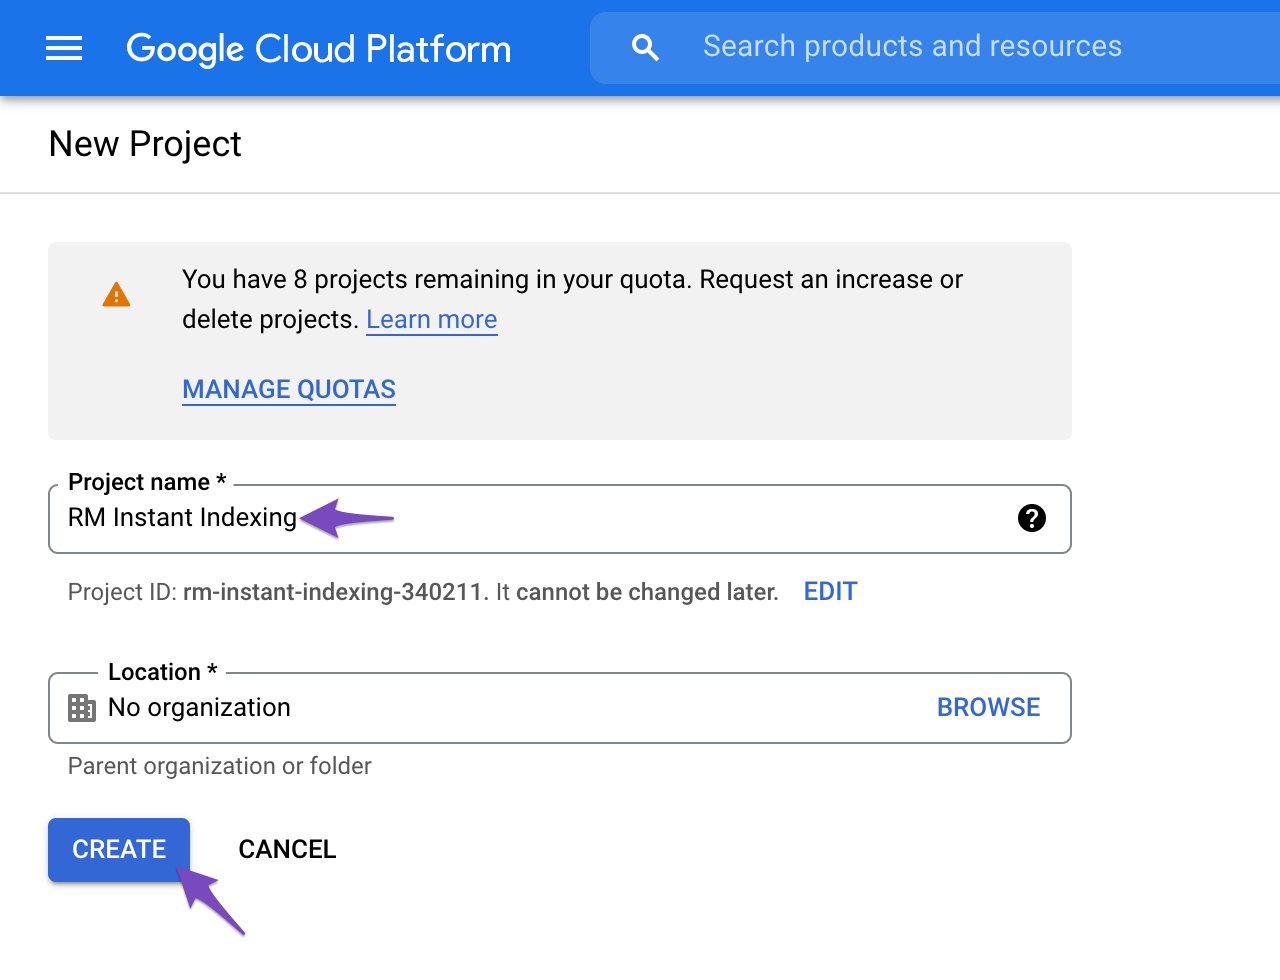
Click the dropdown at the top to create a new project, then give it a name (e.g., “RM Instant Indexing”).
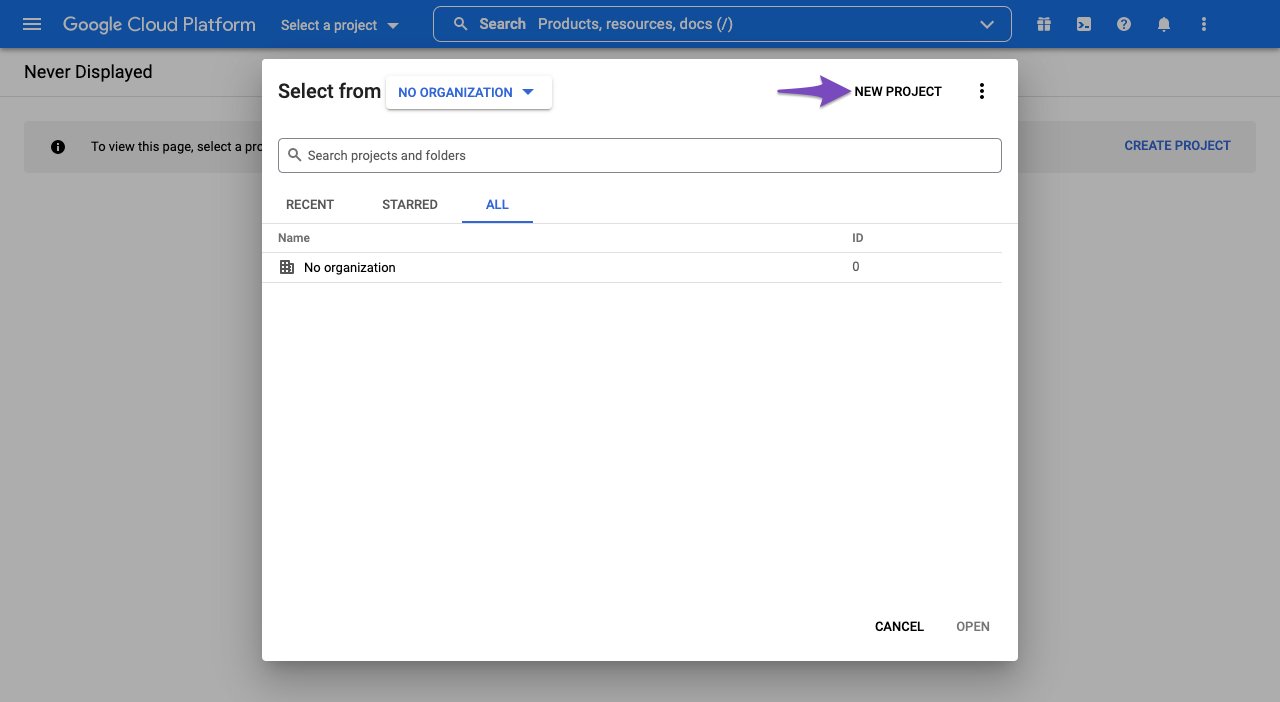

On the next screen, enter your project name and click Create.

Enable Access to the API:
After creating your project, you need to grant it access to the Indexing API.
In the next step, you’ll see a screen similar to the image below.
Make sure the correct project is selected, then click Next and choose Enable.


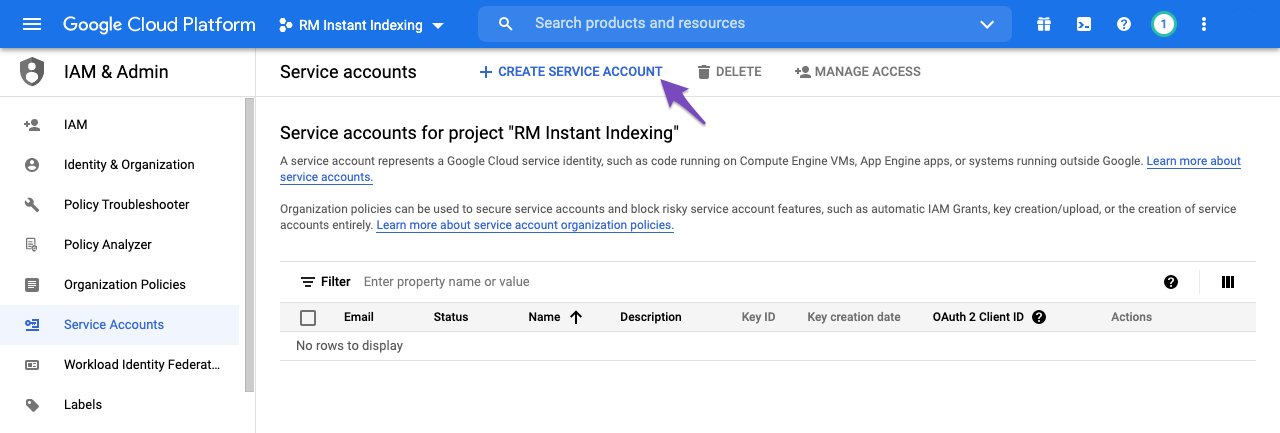
Step 3: Create a Service Account
Next, go to the Service Accounts tab in the Google Cloud Console.
- Make sure you have selected the correct project you just created.
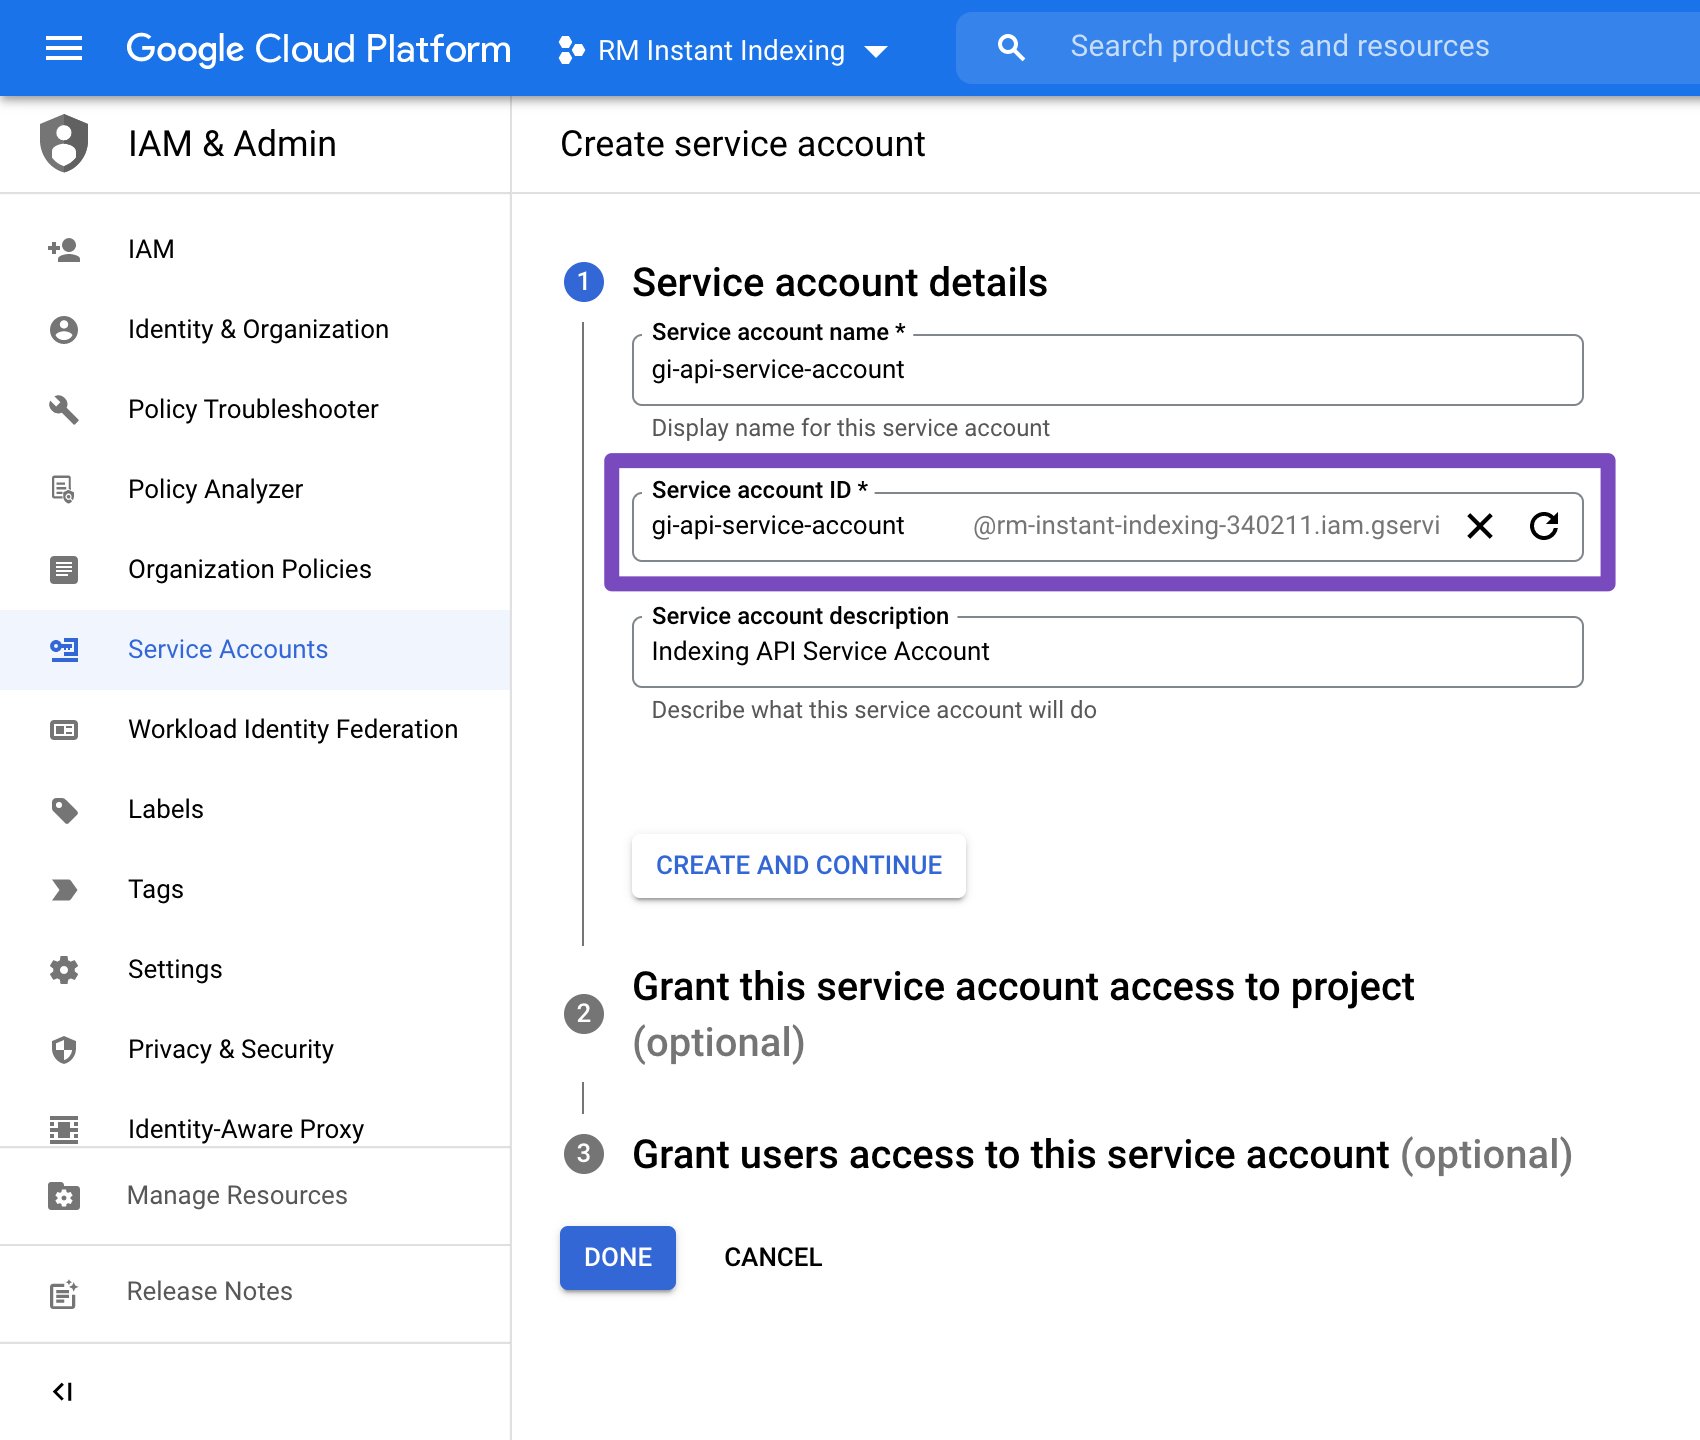
- Click Create Service Account then Enter a name and an optional description for your service account.

Copy the Service Account ID as you will need it in the next step, then click Done to finish.

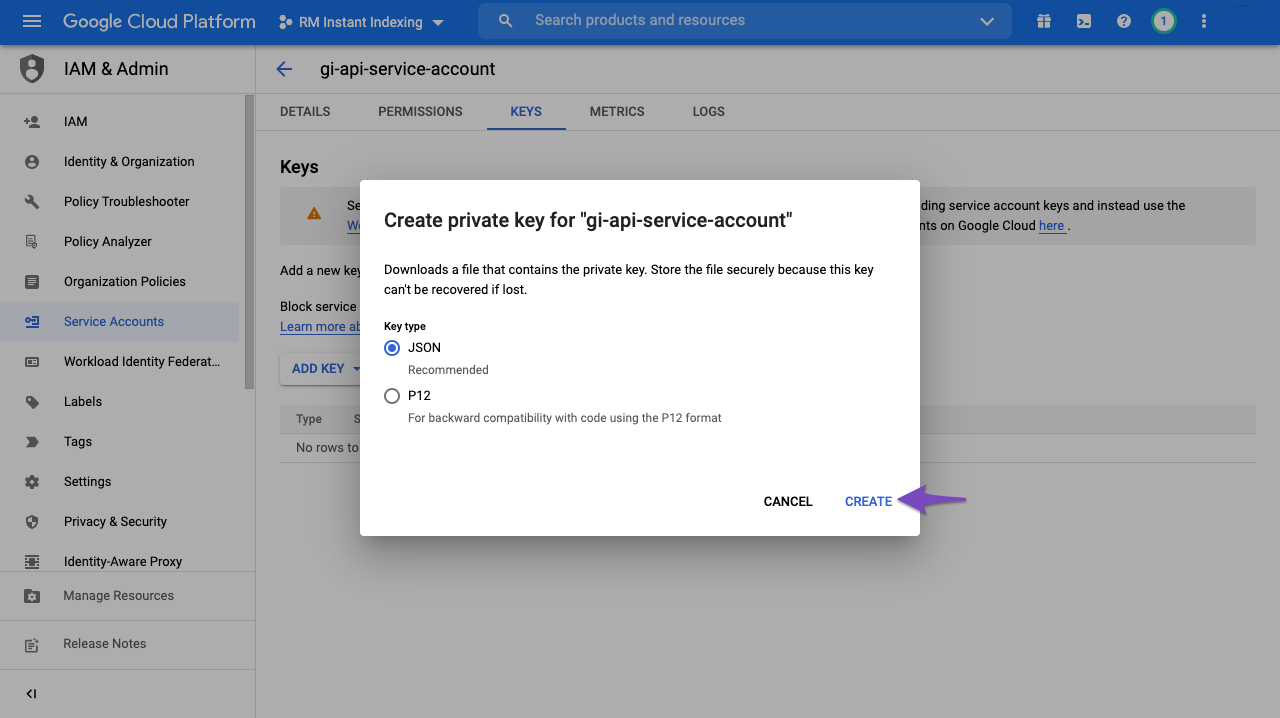
On the next screen, click the three-dot menu under the Actions column and select Manage keys.
Then click Add Key > Create new key > choose JSON, and click Create.
Note: A JSON key file will be downloaded to your computer. Keep it safe — you’ll need it to connect your site to the Indexing API.

Step 4: Grant Owner Permission to the Service Account in Google Search Console
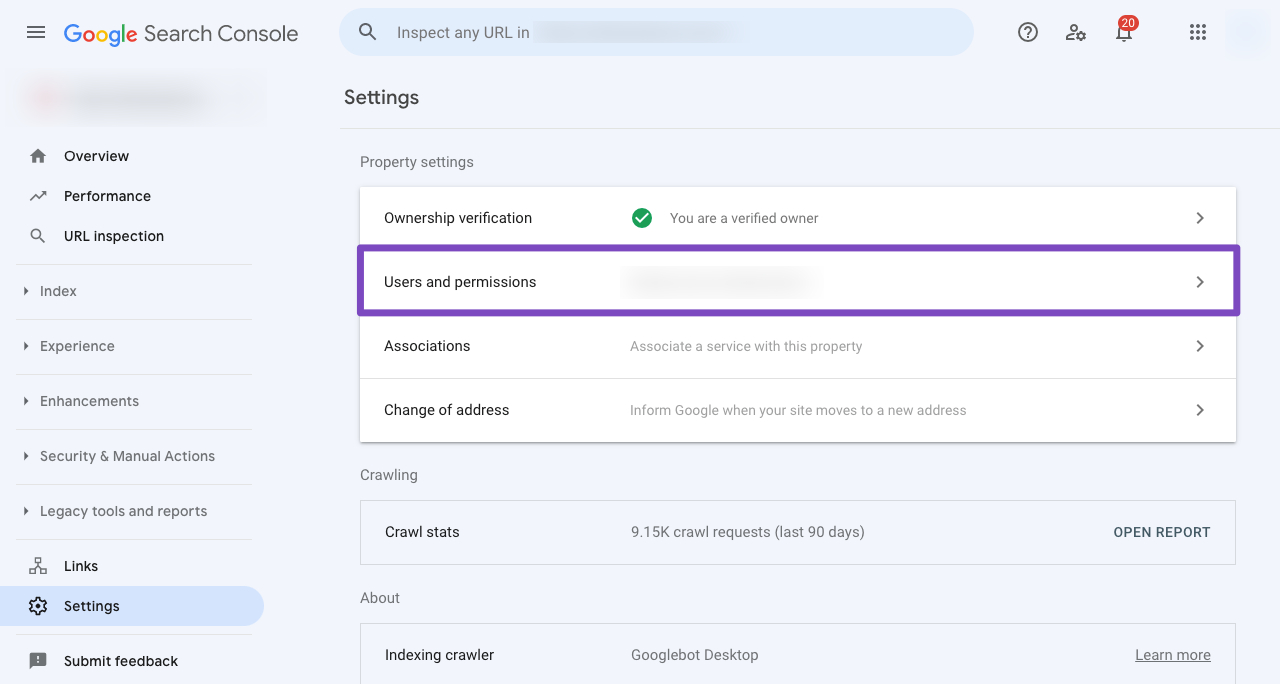

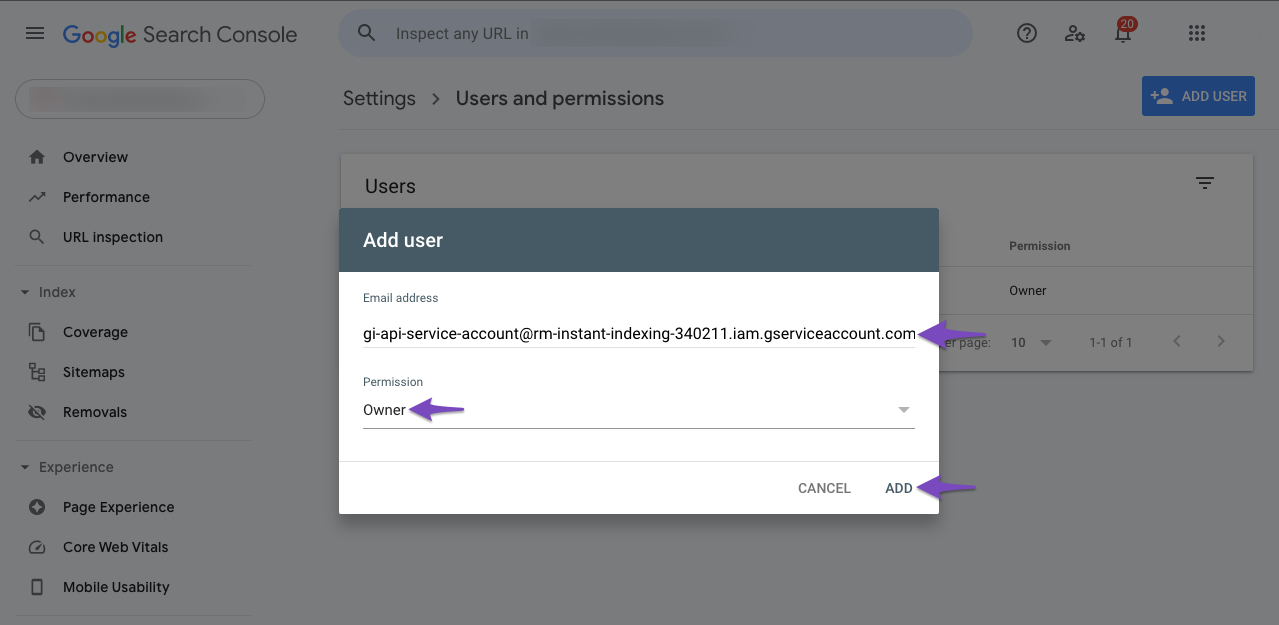
In Google Search Console, go to Settings > Users and permissions > click Add user. Paste the Service Account ID you copied earlier, set the permission level to Owner, then click Add to save.
The Service Account ID is the email-like address you created in Step 3 (e.g., gi-api-service-account@your-project.iam.gserviceaccount.com).


Assign the Owner role to the Service Account ID you copied earlier, then click Add.

Note: If you are configuring a subdomain, make sure you’ve selected the correct domain level in Google Search Console. Otherwise, you’ll need to add the Service Account with Owner permissions separately for each subdomain.
Step 5: Configure the Instant Indexing Plugin
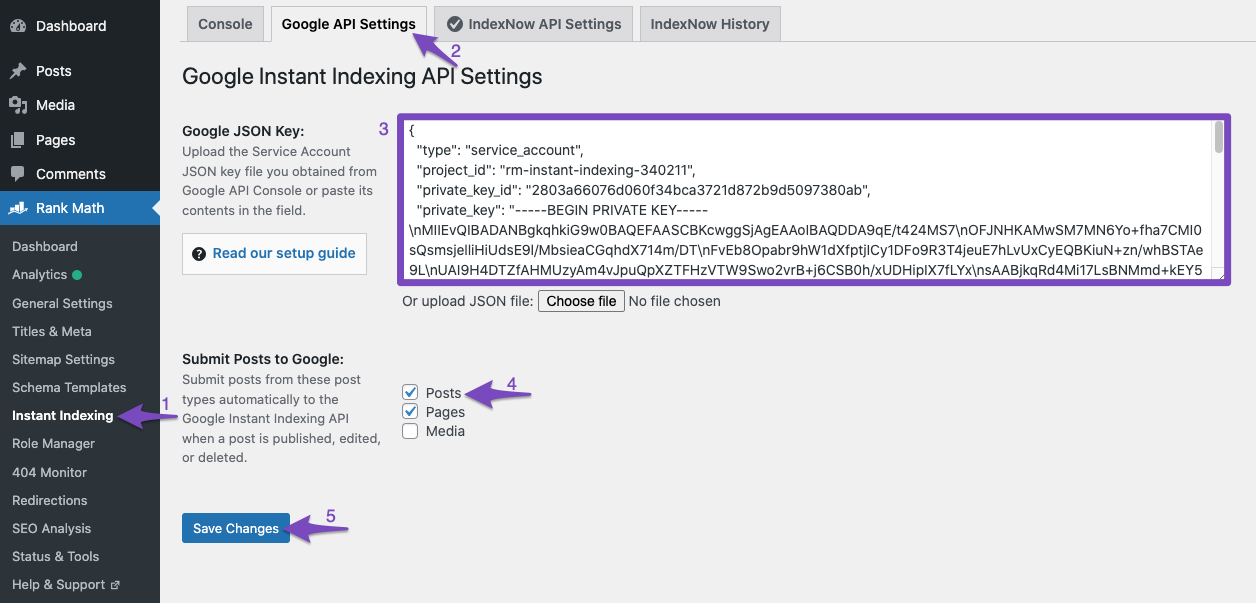
In your WordPress dashboard, go to Rank Math > Instant Indexing > Google API Settings.
Click Choose File and upload the JSON key file you downloaded in Step 3.

Next, switch to the Console tab. Enter any URL you want Google to crawl and index, then click Send to API.
You will instantly receive a response code from the API, as shown in the screenshot below.
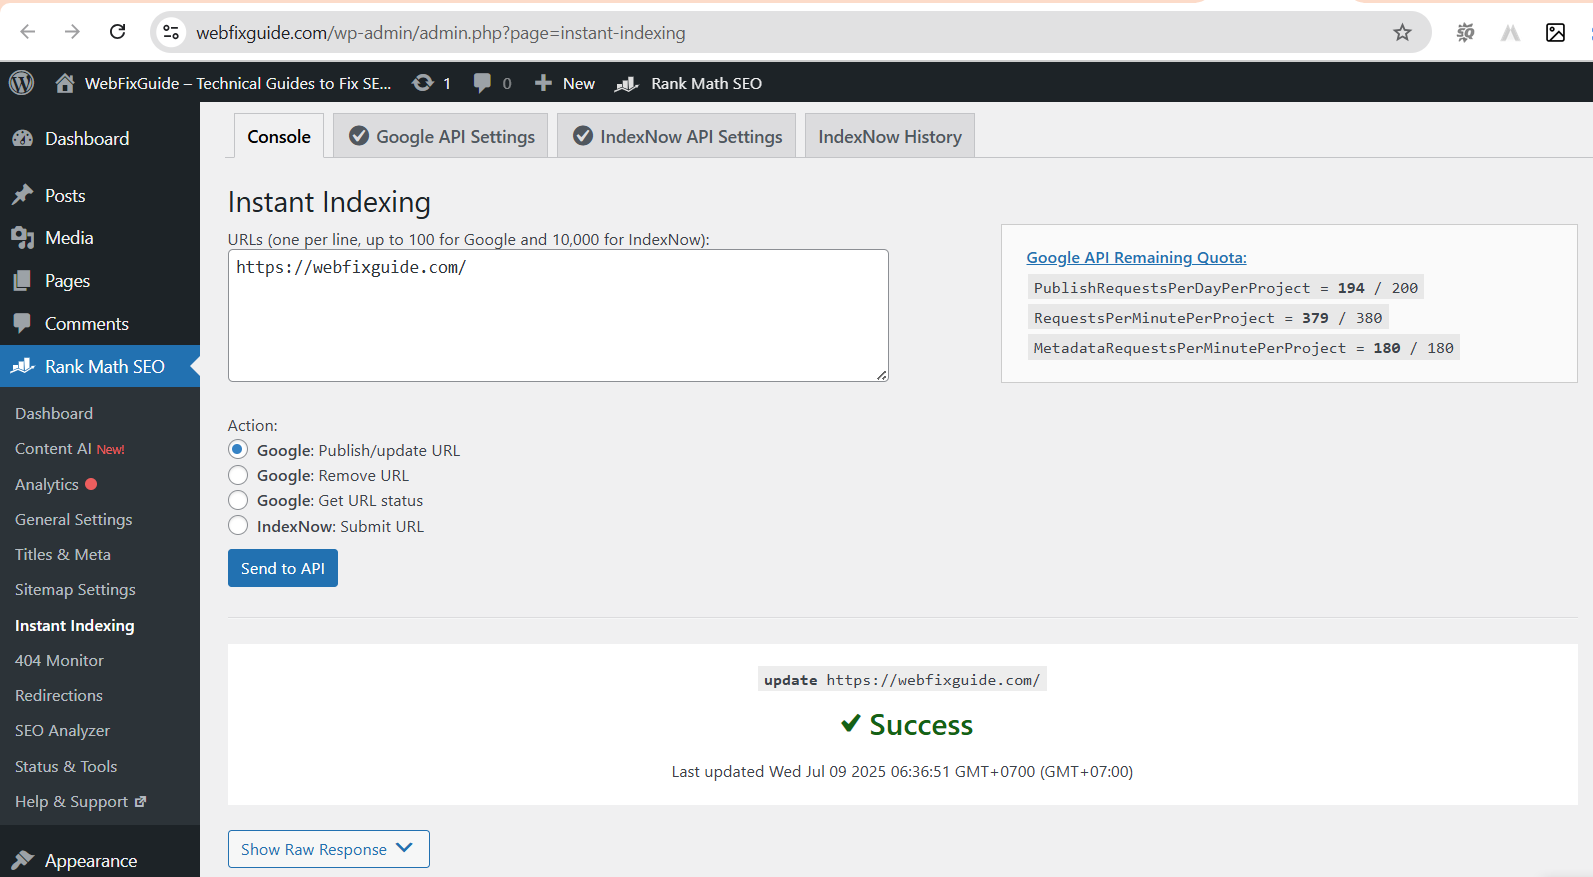

Note: You can use two other features: Remove URL to de-index a URL from Google, and Get URL Status to check the current indexing status of any URL.
Troubleshooting Common Errors When Using Google Index API
❌ 403: Permission Denied. Failed to Verify the URL Ownership
Cause: This error occurs when the Indexing API cannot verify that your service account has permission to submit URLs for the domain.
How to fix it: Go to Google Search Console and ensure the Service Account has been added with Owner permissions. If you don’t see the service account listed, click Add user, paste the Service Account email, and assign it the Owner role.
❌ 404: Requested Entity Was Not Found
Cause: The requested URL hasn’t been submitted or published via the Indexing API yet.
How to fix it: First, submit the URL using the Publish/Update URL function in the plugin or via API manually.
Then, you’ll be able to use the Get URL Status feature to check its indexing status.
❌ 403: Indexing API Has Not Been Used in the Project [Project Name] Before or It Is Disabled
Cause: The Indexing API hasn’t been enabled for your project on Google Cloud Console.
How to fix it: Copy the URL provided by Rank Math and open it in your browser. Select your project, then click Enable API to activate the Indexing API for your project. After that, retry your request.
❌ Error: Undefined
Cause: This happens when you try to submit a URL that belongs to a different domain than the one verified in your Google Search Console property.
How to fix it: Only submit URLs from the domain that is properly verified and associated with your service account. Submitting URLs from other domains is not allowed.
Before using the Google Indexing API, carefully verify the following:
- Your Service Account has been added to Google Search Console with Owner permissions for the correct domain or subdomain.
- The Indexing API is fully enabled in your Google Cloud project.
- You’re only submitting URLs from domains or subdomains that are verified in Search Console.
- You are within the allowed quota limits of the Indexing API to avoid request rejections.
RELATED POSTS